So, you’ve decided it’s time to tackle that wood fence project in your backyard. Great idea once it’s up, you’ll have more privacy, security, and curb appeal. But Building a Fence requires planning, tools, materials, and skills. This is your comprehensive guide on how to build a wood fence in your backyard. With some elbow grease and patience, you’ll gain a useful new skill and transform your outdoor space. Let’s get started
Planning and Permits:
Check with your homeowner’s association and city regulations to determine if you need a permit for your fence height or type. It’s better to spend a little time on the paperwork upfront than face potential fines down the road.

Assessing your property and determining fence layout
Before you begin marking for your fence, It is important that you are aware of the boundaries of your property because if you are not you might end up building a fence on someone else’s property, which can result in a future confrontation. If you don’t have the map of your property you should go and ask the concerned authority for it.
Checking local regulations and obtaining necessary permits
You need to have a permit from the regulatory authority before you begin your fence building. Getting a permit is a must before you begin any construction work as this is your duty as a resident of a community.
Gathering Materials and Tools:
To build that wood fence, you’ll need to gather some essential Wood Fence supplies.

Choosing the right type of wood and fence style
First, pick up 4×4 wooden posts for the corners and gate, and 4×4 or 2×4 rails to attach the pickets. For the pickets, 1×4 or 1×6 boards in your choice of wood will do the trick. Cedar and redwood are great options as they’re naturally resistant to rot and insect, they also provide various designs which serves as an important part of the appearance of your fence.
Acquiring posts, pickets, rails, and other materials
You’ll also need to secure the posts rails and other materials that are necessary for wooden fence installation. Make sure to go for the best materials to ensure that your fence stands the test of time and plays a vital part in protecting your property for years to come.
Assembling essential tools (hammer, nails, level, saw, etc.)
Wood screws or nails to attach the rails and pickets, a level to ensure everything is even, and a tape measure for precision. A circular saw, miter saw, drill/driver, clamps, post-hole digger, shovel, and work gloves are must-have tools. Wood sealant or stain and paint or primer if you want a solid color. These help protect the wood from weathering and enhance its appearance.
With the right materials and tools in hand, you’ll be constructing that new wood fence in no time. Be sure to call your utility companies first to mark any underground lines before you start digging those post holes! Safety first.
Marking the Fence Line
Once you have your materials ready, it’s time to mark your fence line. This step ensures you know exactly where to dig your postholes and install your posts.
Using stakes and string to outline the fence perimeter
The easiest way to mark your fence line is with string and stakes. Pound stakes into the ground where you want the corners of your fence and gates to be. Then tie string between the stakes to map your fence line. This gives you a visual guide for digging your postholes.
As an alternative, you can use spray paint, flour, or limestone to mark your fence line on the grass. However, string and stakes tend to be more accurate and easier to adjust. They also won’t kill or damage your grass like some marking materials might.
Ensuring proper measurements and straight lines
Before settling on a fence line, double-check where your property boundaries are. You don’t want to accidentally build your fence on your neighbor’s property or in a utility easement. It’s best to have a survey of your property done to determine the exact property lines if you’re unsure.
Once your fence line is marked, you’re ready to start digging your postholes and installing your posts. Take your time with this step to ensure your fence ends up exactly where you want it. A proper layout will make the rest of the wooden fence installation process much easier.
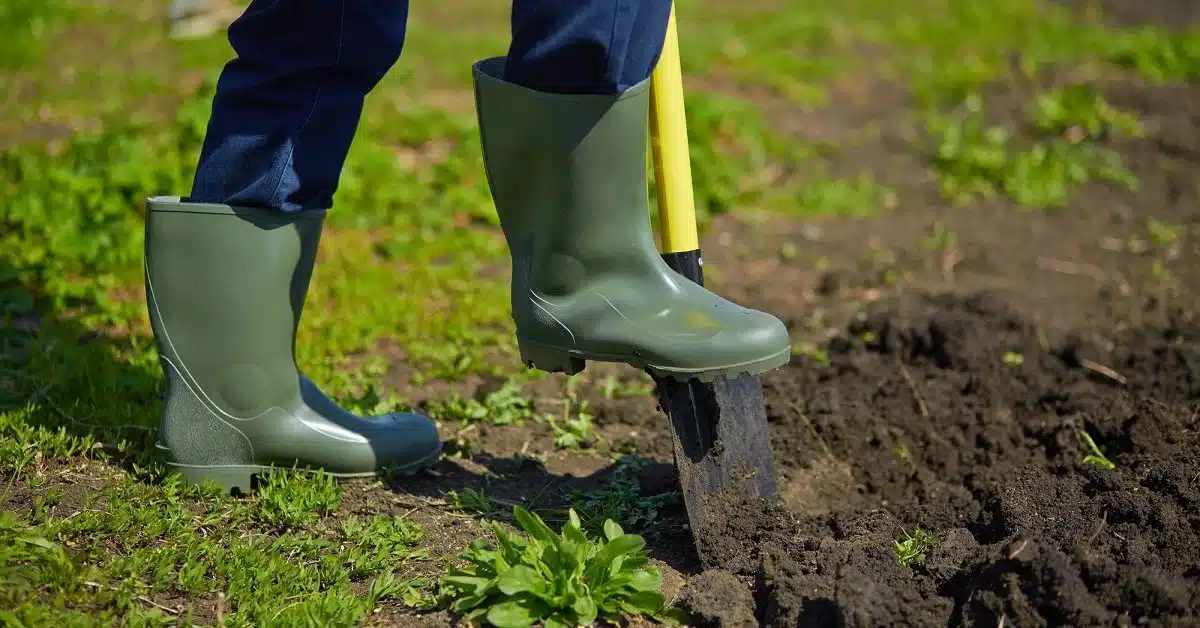
Digging Post Holes
Digging the post holes is a crucial step in building your wood fence. You have to dig holes that are at least 2 to 3 feet deep and 6 to 8 inches wide.
Determining the depth and spacing of post holes
Once dug, you may want to re-check the depth of each hole to ensure the posts will be secured and straight before installing them. It’s much easier to adjust the holes now versus after the concrete has been poured!
Take your time digging the post holes, as this step will determine how sturdy and straight your wood fence will be. Doing it right the first time can save you from many problems down the road.
Using a post-hole digger or auger to create holes
To dig the holes, you’ll need:
-
Post hole digger or power auger
-
Tape measure
-
String and stakes
Use the string and stakes to mark where you want to place the posts. For most residential fences, posts are spaced 6 to 8 feet apart. Measure and mark the post locations before you start digging.
Start digging the post holes at one end of where you want to install the fence. Dig each hole so it’s the same depth and width. As you dig, frequently check that the holes are aligned properly using your string guide.
With the post holes dug, you’re ready to install the posts and rails to start building your wood fence. Careful work always pays off, so make sure to double-check your measurements and post-hole depths before moving on to the next step.
Installing Wooden Fence Posts
Now that you have your wood posts cut to size, it’s time to install them in the ground to form the sturdy base of your fence.
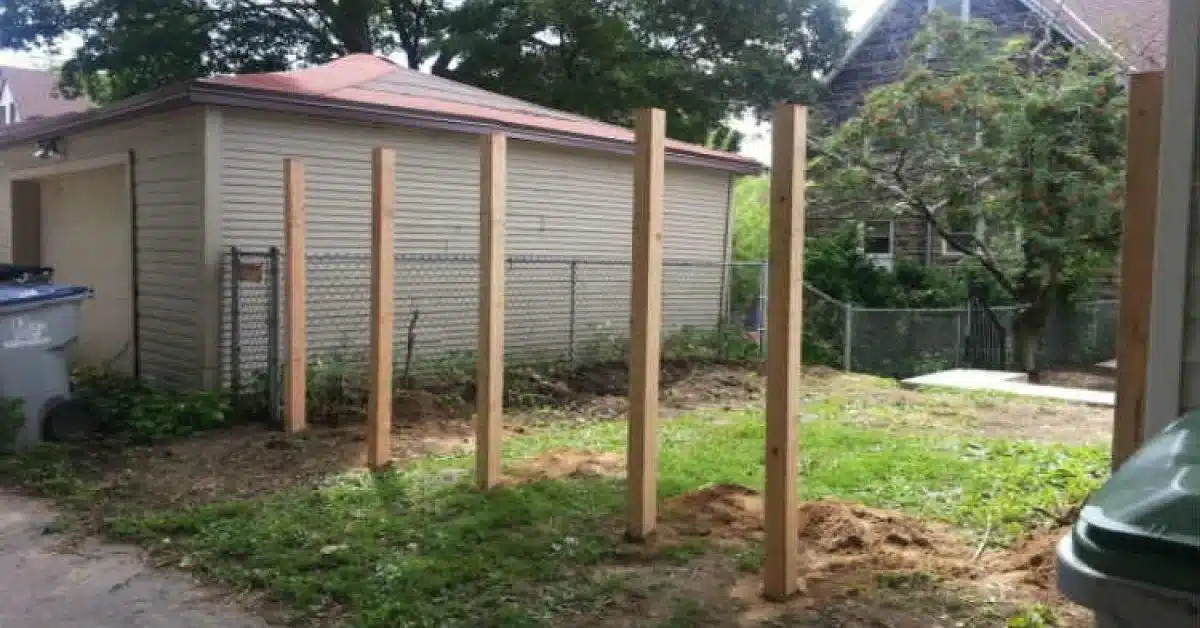
Setting the posts in concrete or gravel for stability
Brace the posts with diagonal braces to hold them in place until the concrete footing has dried. You’ll want to pour about 1/3 of the hole full of concrete and let it dry completely. The concrete will anchor the posts firmly in place to provide a solid base for attaching your fence rails and pickets.
Once the concrete has dried, you can remove the braces. Your posts should now be securely installed and ready for the next step of adding the fence rails. Take a step back and enjoy seeing your fence take shape!
Put a post in each hole and hold it straight while you shovel the soil back around it. Tamp down the soil with a post pounder or hand tamp as you go to compact it.
Checking for level and adjusting as needed
Check that each post is level as you go using a level tool. Adjust as needed by adding or removing soil. For the best results, use a post-leveling guide that attaches to the post to help keep it perfectly straight while you add the soil.
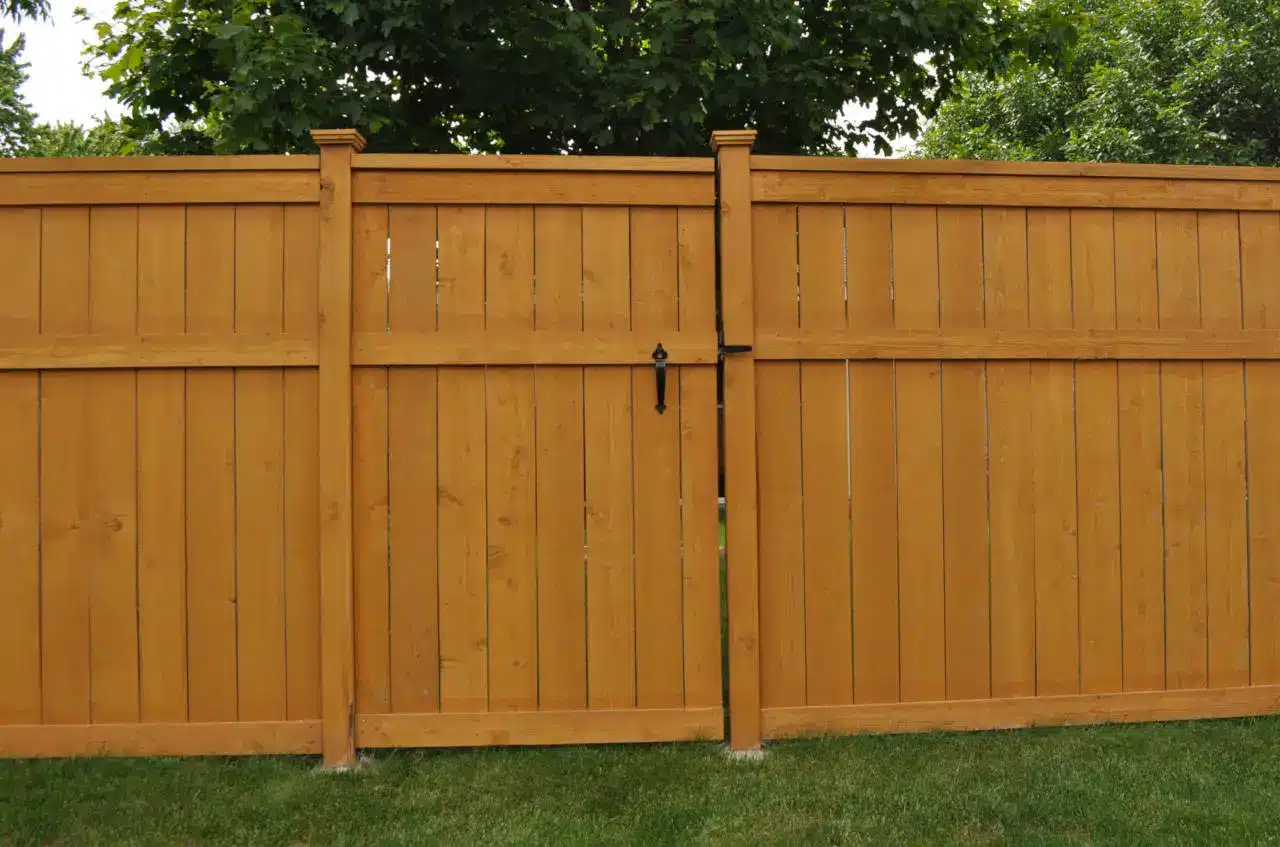
Attaching Rails and Pickets
Once you have the rails attached to the posts, it’s time to add the pickets that make up the actual fencing surface. For a basic wood fence, you’ll want to space the pickets about 3 to 6 inches apart.
Securing horizontal rails to the fence posts
To attach the pickets, place one in between the top and bottom rail. Center it, then secure it in place by driving two galvanized nails through the side of each rail into the picket. Work your way down the fence, adding one picket at a time and securing each before moving on to the next.
For a shadowbox-style fence with alternating board directions, you’ll need to measure and mark the rail to determine picket spacing. Then attach the pickets to the top rail only at first. Once they’re all secured, install the bottom rail and drive nails through it into the ends of each picket.
Affixing pickets vertically between the rails
Whether you choose a basic vertical picket fence or a more decorative shadowbox style, the key is to take your time to ensure each picket is evenly spaced and securely fastened to the rails. Double-check that all parts are level for the most professional-looking result. Your new wood fence will provide privacy and curb appeal to your yard for years to come!
Building Gates (if applicable)
Once you’ve built the fence sections, it’s time to install any gates you need. Gates allow access to your yard and should be built to match your backyard fence design.
Select a gate style that complements your fence. The most common options are double swing gates or single gates. Double swing gates are ideal for wide openings and provide maximum access. Single gates work well for narrow access points. You’ll also want to consider a self-closing hinge to ensure the gate swings shut behind you.
Measuring and cutting materials for the gate frame
Build the gate frame to the same height as your fence posts. Use 2×4 boards for the outer frame and 2×2 boards for the inner frame. The inner frame provides support for the pickets. For double swing gates, create two separate frames and join them together with cross braces for extra stability.
Space the pickets evenly and attach them to the gate frame using wood screws or galvanized nails. Cut the pickets to the same size as the fence pickets. For a rustic look, you can distress the pickets by hammering in dents or sanding the edges. Apply a sealant to the wood to protect the gate from the weather.
Installing hinges and latch hardware
Attach hinges to the gate frame and fence post to allow the gate to swing open and closed. For double gates, install a drop rod to keep the gates secured together when closed. Install a latch to keep the gate closed when desired. Test the gate to ensure it’s level, securely installed, and functioning properly before considering your fence complete!
Adding Finishing Touches
Now that your fence posts and rails are up, it’s time to add some finishing touches.
Staining or Painting
To protect the wood and enhance its appearance, apply a coat of stain, sealant, or paint. Stain allows the wood grain to show through while paint provides solid coverage. Choose a color that complements your home’s exterior. Apply at least two coats, waiting 24 hours between applications.
Trimming the tops of pickets for a uniform look
Add trim boards to the top rail for extra style. You can also use trim to frame the fence boards in an attractive pattern. Miter the corners for neat edges.
Sanding any rough edges and surfaces
For a polished look, you can sand the rough edges of each post with the help of sandpaper. Sanding the fence makes it safe for the bystanders and it is child friendly as it prevents serious injuries. Secure the fences with proper fencing to get the best results.
Staining or Sealing the Fence
Now that your fence is built, it’s time to protect the wood. You have two options: stain or sealant. The stain will change the color of the wood while still allowing the grain to show through. The sealant is clear and protects the wood while maintaining its natural color.
Applying a protective coat to enhance durability
For staining, you’ll need to choose an oil- or water-based stain, then select a color. Oil stains tend to last longer but water stains are more environmentally friendly. Apply at least two coats, waiting 24 hours between applications. Use a brush to stain the fence by wiping away any drips or splatters as you go.
For sealant, choose either oil or water-based polyurethane or lacquer. Oil versions tend to last longer but have strong fumes. Water-based options are odorless and dry faster but may require more frequent reapplication. Apply at least two coats of sealant, waiting 2 to 4 hours between coats.
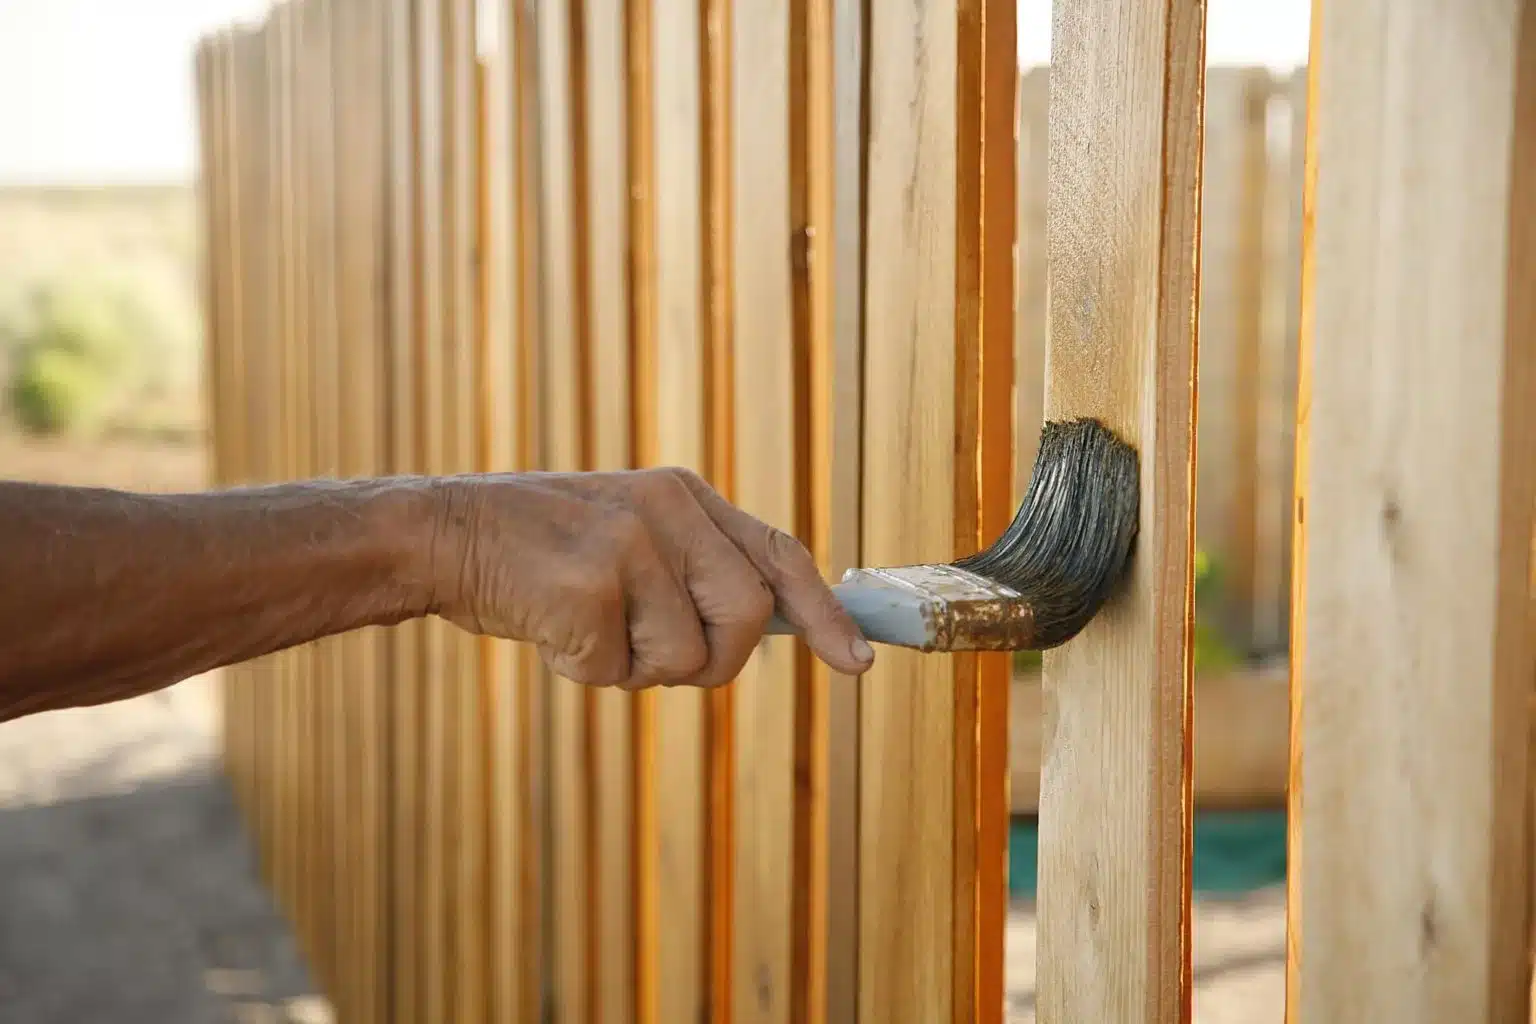
Enhancing the fence’s appearance with a suitable finish
After you have applied the sealant on your wood fence panels it will automatically enhance the aesthetical appearance of your fence. You can add the finishing touches for the best result.
Conclusion
After all that hard work you finally know, how to build a wood fence and you now have a sturdy wood fence surrounding your backyard. You can stand back and admire your handiwork. Not only can you save a bundle of money by DIYing this project, but you can also gain useful skills and the satisfaction of building something with your own two hands. The next time you’re firing up the grill or kicking back in your lawn chair, you’ll appreciate that fence even more by knowing the effort that went into putting it up. Building things yourself isn’t always easy but it sure can be rewarding.